GitHub博客hexo建站之设置SSH密钥
GitHub博客hexo建站之设置SSH密钥
jlynet我们十分建议大家在玩转GitHub时使用SSH连接。SSH keys是一种鉴定信任电脑的方式,同时不需要输入密码。以下步骤将会教你产生一个SSH keys并把这个公共的密钥添加到你的GitHub账户中。
Tips:我们建议你经常审查你的SSH keys列表并取消那些用了一段时间的账户。
第一步:检查SSH keys
首先,我们需要检查你的电脑中是否存在SSH keys。打开Git Bash 并输入:
1
2
$ ls -al ~/.ssh
# 列出你.ssh目录中的文件(如果存在文件的话)检查一下目录列表查看一下是否有
id_rsa.pub或者id_dsa.pub. 如果这两个文件都没有,查看第二步。否则,看第三步。第二步:创建一个新的SSH key
为了创建一个新的SSH key,复制粘贴下面的代码,一定要填上你的E-mail地址。默认的设置是非常棒的,所以你当你被提示“Enter a file in which to save the key”,仅仅按回车(Enter)继续。
1
2
3
4
$ ssh-keygen -t rsa -C "your_email@example.com"
# 创建一个 ssh key, 用准备好的email作为标签
Generating public/private rsa key pair.
Enter file in which to save the key (/c/Users/you/.ssh/id_rsa): [Press enter]接下来,你将会被要求输入密码.
Tips:我们强烈建议输入一个好的,安全的密码,更多信息查看 Working with SSH key passphrases.
(译者注:这个密码需要记好,后面会用到)
1
2
Enter passphrase (empty for no passphrase): [Type a passphrase]
Enter same passphrase again: [Type passphrase again]你将会看到以下提示:
1
2
3
4
Your identification has been saved in /c/Users/you/.ssh/id_rsa.
Your public key has been saved in /c/Users/you/.ssh/id_rsa.pub.
The key fingerprint is:
01:0f:f4:3b:ca:85:d6:17:a1:7d:f0:68:9d:f0:a2:db your_email@example.com然后在你的ssh-代理上添加上你的新的密钥:
1
2
3
4
# start the ssh-agent in the background
$ eval "$(ssh-agent -s)"
# Agent pid 59566
$ ssh-add ~/.ssh/id_rsa第三步:在你的GitHub账户中添加上SSH key
运行下面的代码把key复制到你的粘贴板中:
1
2
$ clip < ~/.ssh/id_rsa.pub
# Copies the contents of the id_rsa.pub file to your clipboard或者,用你最喜欢的编辑器,打开
~/.ssh/id_rsa.pub文件,手动把文件中的内容复制到粘贴板。现在有了key的复制版,是时候添加到GitHub中了:
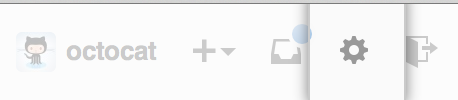
1.在任意页面的右上角用户栏中,点击 Account settings

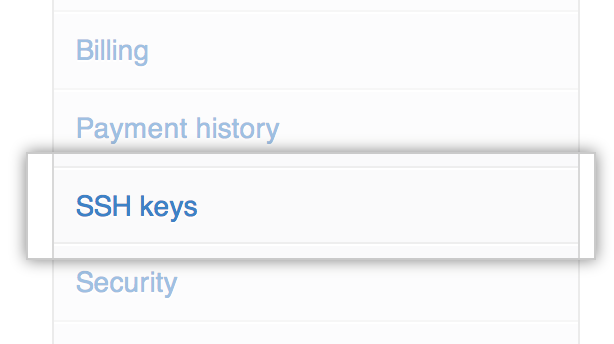
2.左侧点击 SSH Keys.
3.点击 Add SSH key.
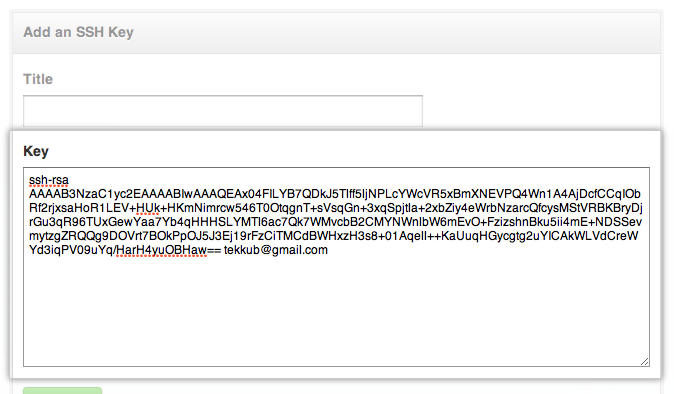
4.在标题框中,添加这个新key的描述标签。例如,如果你使用的是个人的Mac,你可以把这个key叫做“Personal MacBook Air”。
5.把你的key粘贴在 “Key” 标签下的文本框中.
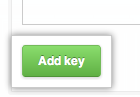
6.点击 Add key.
7.输入你的GitHub 密码以确认身份.
第四步:测试everything
为了确保所有的操作都在工作,现在需要SSHing一下GitHub。当你这么做的时候,你将会被要求输入密码以证实你的行为,就是之前你创建的密码。
打开Git Bash并输入:
1
2
$ ssh -T git@github.com
# Attempts to ssh to github你可能会看到这样的警告:
1
2
3
The authenticity of host 'github.com (207.97.227.239)' can't be established.
RSA key fingerprint is 16:27:ac:a5:76:28:2d:36:63:1b:56:4d:eb:df:a6:48.
Are you sure you want to continue connecting (yes/no)?不要担心,这必然会发生。这是为了证实你上面提供的终端机器中的fingerprint(指纹),然后输入“yes”
1
2
Hi username! You've successfully authenticated, but GitHub does not
provide shell access.如果username是你的名字,那么说明你的SSH key成功安装!不用担心 “shell access” 这件事情,因为你根本用不到。
如果你收到的消息是”access denied,” 你可以read these instructions for diagnosing the issue.
如果你是将SSH转换为HTTPS,你将需要更新你的远端仓库中的URLs,更多信息查看Changing a remote’s URL.